If you want to set up your own photography website to give your photos a home on the Internet, then this guide will show you how!
Whether you want to sell your images as stock photos, sell prints, create a blog to share your photography stories, images, and articles, or you just want some simple, elegantly designed galleries to share photos with your family and friends, then you’re in the right place!
My name is Steve Arnold, founder of PostProcessingMastery.com and PhotoMasteryClub.com where I’ve been teaching photography online since 2013.
Over the years I’ve built over 300 websites of my own, plus I’ve built and currently manage over 30 photography websites for my Photo Mastery Club members.
I’ve built every single one of these website on the WordPress framework. In fact, between 20-30% of all websites in the entire world are built on WordPress. For me, when deciding which platform to build a new site on it really is a no-brainer decision. Wordpress is the way to go!
Why set your own site up
You’ve probably seen a bunch of companies out there that offer simple, elegant websites that are easy to set up and maintain. So you might ask yourself why bother setting up your own from scratch?
There are many good reasons, but mostly, it comes down to control and ownership.
When you have a website on a site like Wix, Redbubble, Squarespace, Webflow, Photoshelter etc, you don’t really own that website.
If you decide move your site to a new provider later, many of them may let you download your content from their servers so you don’t lose any of it, but you’ll have to build your site all over again with your new provider.
You’re limited to whatever templates and layouts these sites let you choose from.
You’re limited in what functionality you can add to your site.
The list goes on…
On the flip side of that – When you own your own photography website and host it on a web host of your choosing (eg Hostgator, LiquidWeb etc), you can do what ever you like with it.
You can choose a design and layout that suits your needs perfectly.
You can add whatever functionality you want to it (contact forms, shopping cart, newsletter signup forms, maps, galleries etc).
You can move your site, as-is, to another web hosting provider if you get a better deal on hosting somewhere else.
You can sell images from your site and take ALL the profit (rather than giving a huge cut to the website company).
You can do virtually anything you want!
So with this in mind, I’ve created this guide for you so you can set up your very own “self hosted” WordPress website for your photography and reap all the benefits that this will bring.
STEP 1: Choose And Purchase Your Domain Name
The very first thing to do is choose an awesome domain name for your awesome new website.
Spend some time researching a domain name that isn’t already registered and when you find one, follow the simple sign-up and registration process.
I recommend using NameCheap for registering your domain name. I’ve used NameCheap to register over 300 of my own domains over the years and have always had a good experience!
Click HERE to find and register a domain name for your website.
Tips:
- Choose something with an obvious phonetic spelling and doesn’t need explaining after you tell it to someone.
- Bad example: stevesfotosite.com
- Good example: stevesphotosite.com
- You’ll soon get sick of having to say “steves photo site .com – that’s with an f, not a ph”
- Avoid hyphens and numbers in your domain name for the same reason as above.
STEP 2: Purchase And Set Up Web Hosting
Next, you’re gonna need a Web Host.
Somewhere to store your website files on the Internet. A physical server (fancy name for computer) that gets accessed every time someone visits your site.
Step 2 in this process therefore is to get an account with a reliable web hosting company.
I use and happily recommend Hostgator and Liquid Web. I’ve used them both for years and they’re great at what they do.
Both of these web hosts have a simple signup process and make it a cinch to install Wordpress. They have very helpful support staff too.
Each web hosting company has their own set of specific instructions on how to install Wordpress which may change on a regular basis, so after you sign up I’d recommend checking their documentation on how to do this.
Web hosting can run anywhere from a few bucks per month, to a few hundred – depending on the level of hosting you want.
For most photographers, a basic level package will do just fine.
Click here to sign up to Hostgator
Click here to sign up to Liquid Web
STEP 3: Sign up to Cloudflare
Cloudflare is a fantastic free service that provides many benefits, but the two most important to us photographers are:
1: With Cloudflare, we get a free SSL certificate to make our websites secure and less prone to certain types of hacking. SSL also makes it acceptably safe to take credit card payments through your website.
2: Cloudflare acts as a Content Delivery Network (CDN), which makes our websites load faster.
What’s a CDN?… A regular web server is a physical computer at a single location. A website on a server in England might load slower for someone accessing it from Australia, compared to someone accessing it from England.
With your site connected to a CDN, static files (like images) are distributed (duplicated) to a number of physical servers around the world, so that when someone visits your site, the files are loaded from the server nearest to that person.
You might be wondering why you need a web host if you’re also using a CDN to host your files. That’s a good question to ask! The answer is that a CDN doesn’t serve ALL your files, only certain static files (like images). Your websites database (kinda like the brain of your website) still needs to exist on your web hosting server.
Go ahead and sign up for a free Cloudflare account and follow the steps to “add your site” to the Cloudflare system.
Once you’ve done this, you’ll be shown details of 2 “Name Servers”.
Write them down for use in the step 4.
STEP 4: Update your DNS Settings
Log back into your NameCheap account and locate the DNS settings screen for your domain.
Change the values ofthe Primary and Secondary name servers to the values you noted downin Step 3 (Cloudflare).
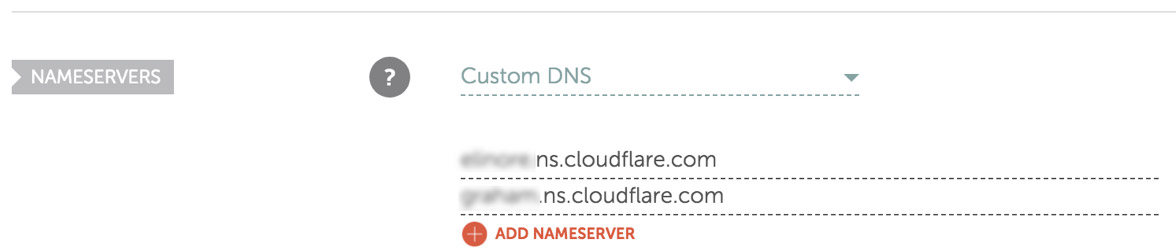
Save these changes and then wait up to 48 hours for the change to take effect and for CloudFlare to pick them up (it’s usually much quicker, often only a few hours).
You’ll receive an email from CloudFlare once they’ve picked up the DNS changes. At which point you can move on to step 5.
STEP 5: Install WordPress
Both Liquid Web and Hostgator make it really easy to install wordpress.
I recommend using the instructions provided by whichever host you chose to use, because the steps may be slightly different.
Either way, you’ll have to provide some basic information during the setup process (like your name, email and website name) and you’ll receive in return a user name, password and website login url.
Store these details somewhere safe, then take the maiden voyage (log in) to your website dashboard!
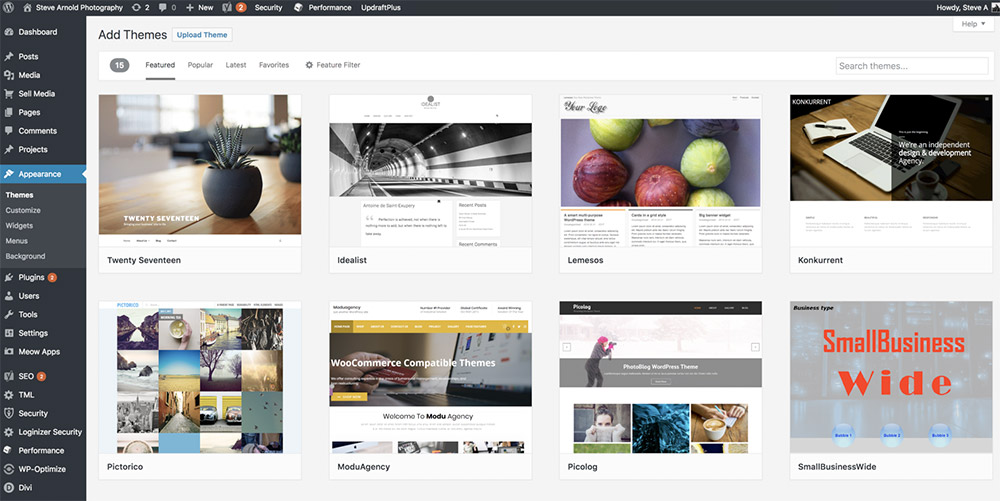
STEP 6: Choose and install a theme
One of the greatest things about WordPress is that there are virtually limitless designs and layouts available for you to choose from.
In WordPress terms, a website design template is called a “Theme”.
There are countlessfree themes, and there are premium themes which are available topurchase.
Nearly all of them have been developed and designed by third party developers.
When it comes to choosing a theme for your site, first, you have to find one you actually like the look of.
But of equal importance is how reliable the theme developer is. Are they actively updating the theme and releasing new versions to ensure maximum compatibility into the future?
Spend a little time browsing the Themes section of your WordPress dashboard to get an idea for what’s available. You can preview themes with the click of a button, and even install them directly onto your site just as easily!
If you do install and activate a handful of themes to see how they look on your site, make sure you uninstall the ones you end up not using.
I recommend using atheme called Divi, by a company named “ElegantThemes”.
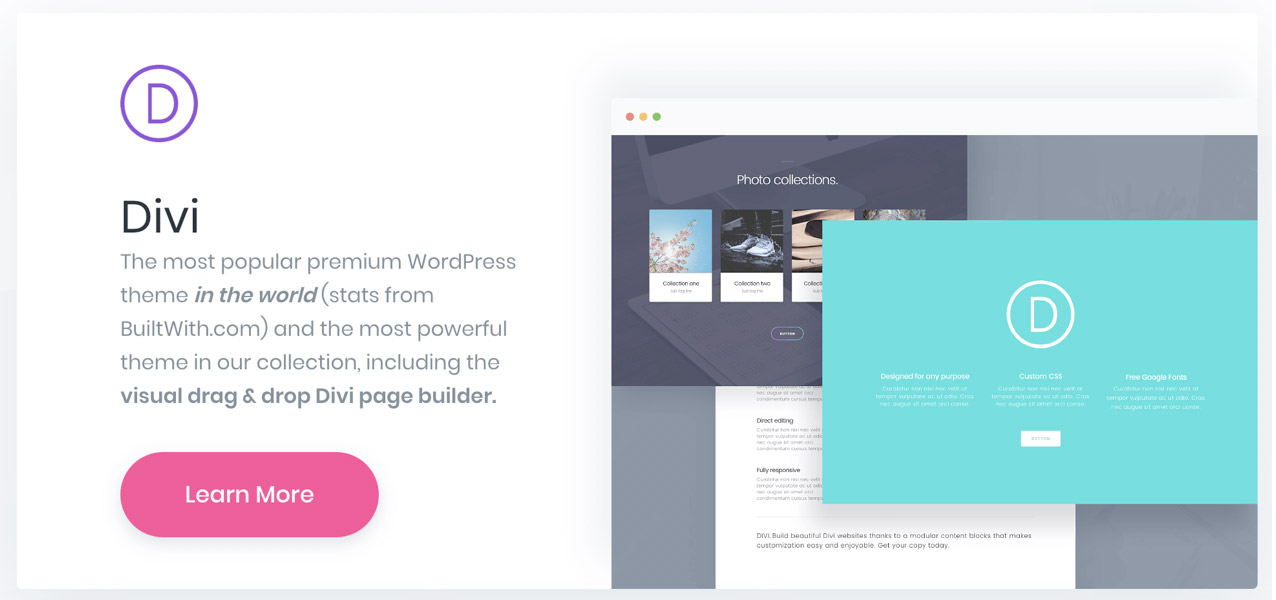
Divi offers the ultimate customization, so you can set your site up to look exactly how you want. It has a great visual builder that makes drag-and-drop page design easy.
They have a responsive team of developers who are always adding new exciting functionality, a great support desk who can help you with anything Divi related, and it’s very reasonably priced.
Divi is the theme I use on ALL my own new sites now, and it’s what I use when building websites for clients .
Click here now to get the Divi theme from Elegant Themes.
Once you’ve purchased your Divi license, download the theme installation file from the Elegant themes website, then upload and install it to your website using the options in your WordPress dashboard.
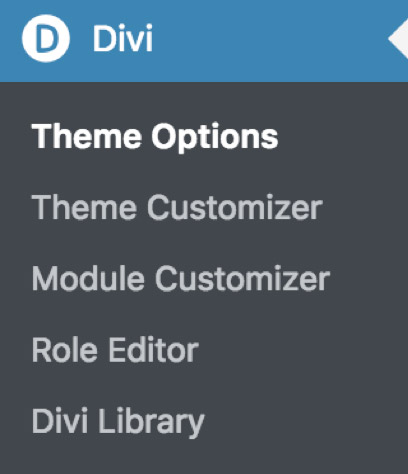
STEP 7: Perform Initial WordPress and Divi Configuration
Now that you’ve installed WordPress and uploaded and activated the Divi theme, it’s time to make some “out of the gate” configuration changes.
Having installed Divi, you’ll notice a new menu item in your WordPress dashboard. From there, you can browse to the “Theme Options” screen to make the first few updates.
Upload Your Logo
If you have a logo,you can upload it to the “Logo” section of the Theme OptionsGeneral tab. Whatever you upload here will be placed in the header ofall your website pages.
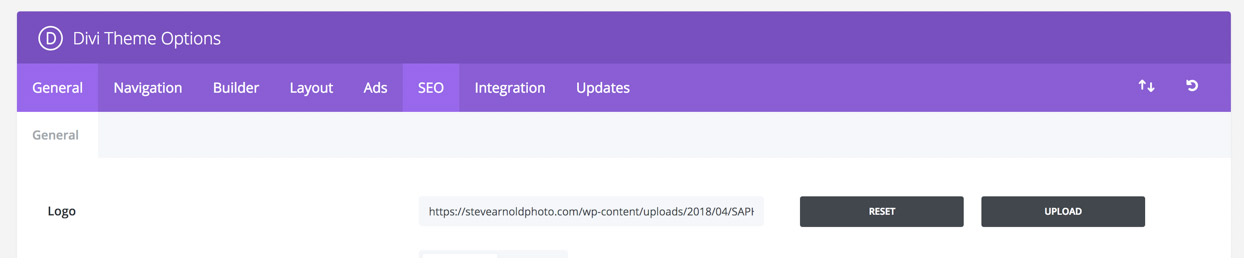
Tip: crop off any white space around the edges of your logo before uploading to prevent your logo appearing really small on your site.
Upload Your Favicon
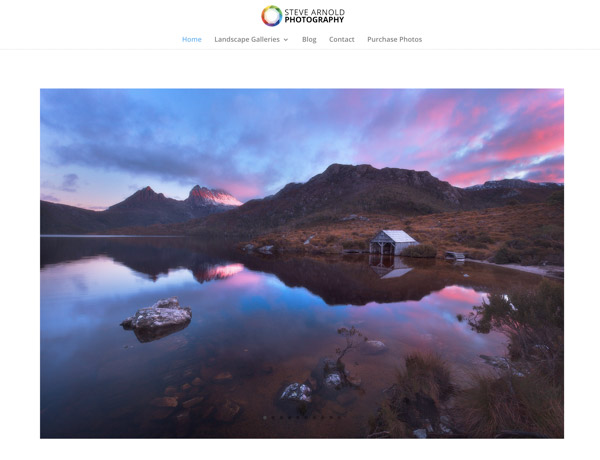
A Favicon is the tinylogo that appears in the browser tab next to your site name:

In the screenshot above, it’s the logo to the left of the “Home” label.
To create a favicon you need to create a 16×16 pixel image, save it as a PNG file, then upload it to any of the free online ICO converters that you can easily find on Google.
The option to upload afavicon can be found immediately under the logo upload option.
Updates (API Key)
The next important update you must make is to add your API key to the Divi settings.
This secret and unique API key will allow your website to connect with the Divi update servers so that when the Divi code is updated by the developers, you can easily update your copy of it with the latest version on your site with the click of a button.
First log into the Elegant Themes members area and locate your unique API key.
Then simply copy andpaste this into the API Key setting found under the “Divi >Theme Options > Updates” section of your WordPress dashboard. Itwill also ask for your user name – this is the user name you use tolog into the Elegant Themes members area.
Home page – Blog or Page
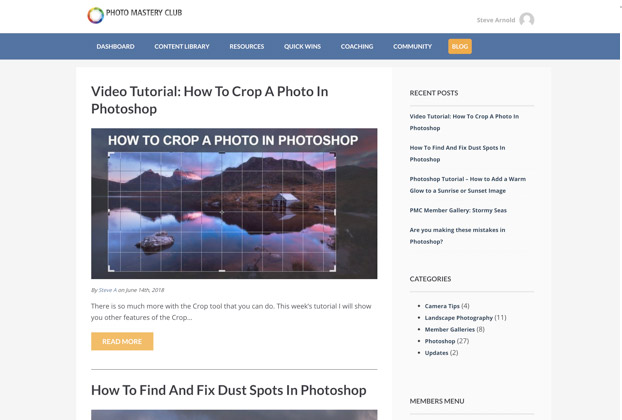
One kinda big decision you need to make is whether you want the home page of your site to be a static page containing perhaps a gallery and some information about you. Or whether you want your blog page to be the main page of your site.
This decision will depend on what type of site you are creating. If you consider your site more like a blog where you’ll be posting regular articles and updates, then it makes sense to have the blog as your home page. If your site is more just about showing your beautiful images in clean, elegant galleries, then you might choose to have a simple gallery of some of your best work on the home page.
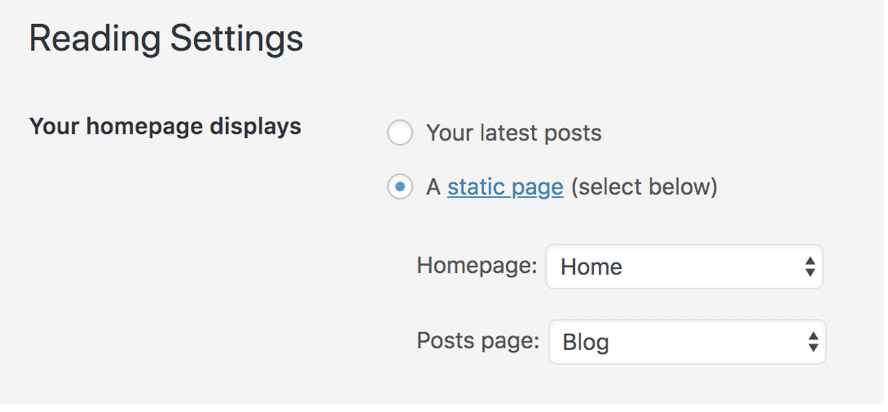
Once you know whatkind of home page you want, you can set it in the “Settings >Reading” area of your wordpress dashboard:
Theme Customiser Updates
This is where you can start personalizing the layout and design of your site structure.
First, click the “Divi > Theme Customizer” menu item in the WordPress dashboard. This will produce a view of your website with a sidebar that contains many settings for you to explore.
Feel free to explore these settings and get to know what’s possible.
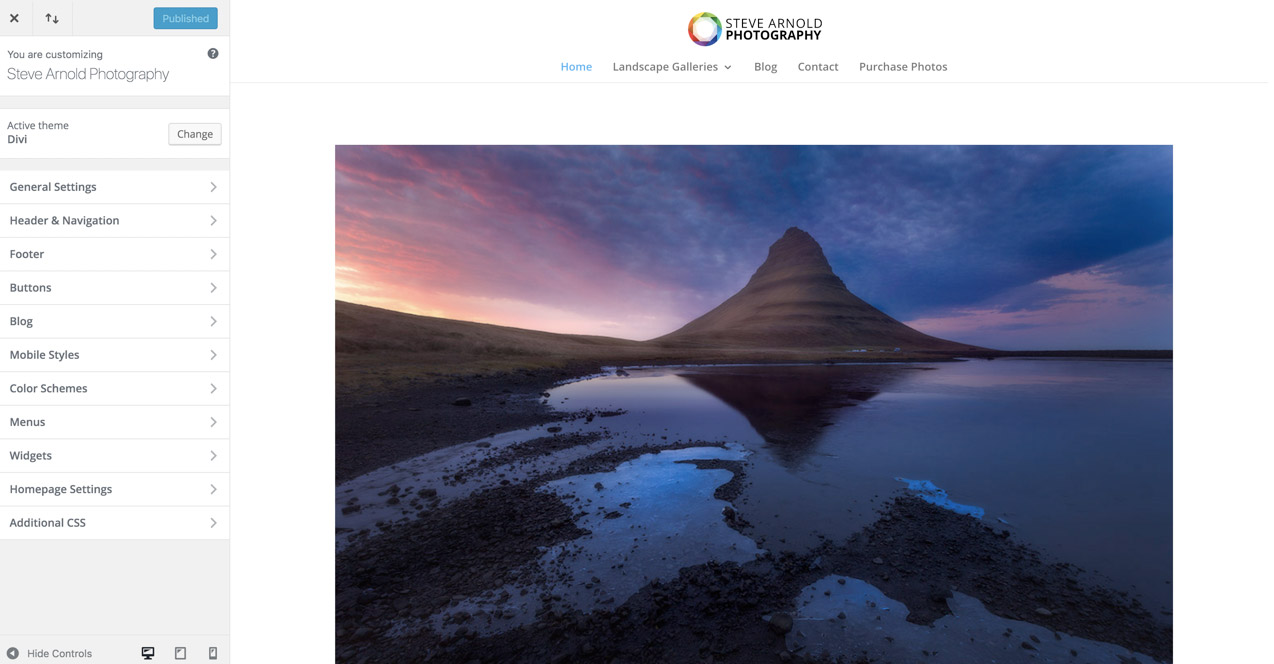
Here are some items you might want to look at first:
Header / Menu Layout
This setting allows you to choose between 4 types of site header layout.
Centered – Logo in the center of the page with the main menu underneath.
Centred Inline– Logo in the centre of the page in the middle of the menu
Slide In – The menu is accessible via a button and then slides in on the side of the page when the button is clicked. I personally don’t like this option!
Full Screen – The menu is accessible via a button and then takes over the full screen when the button is clicked. I also do not like this option!
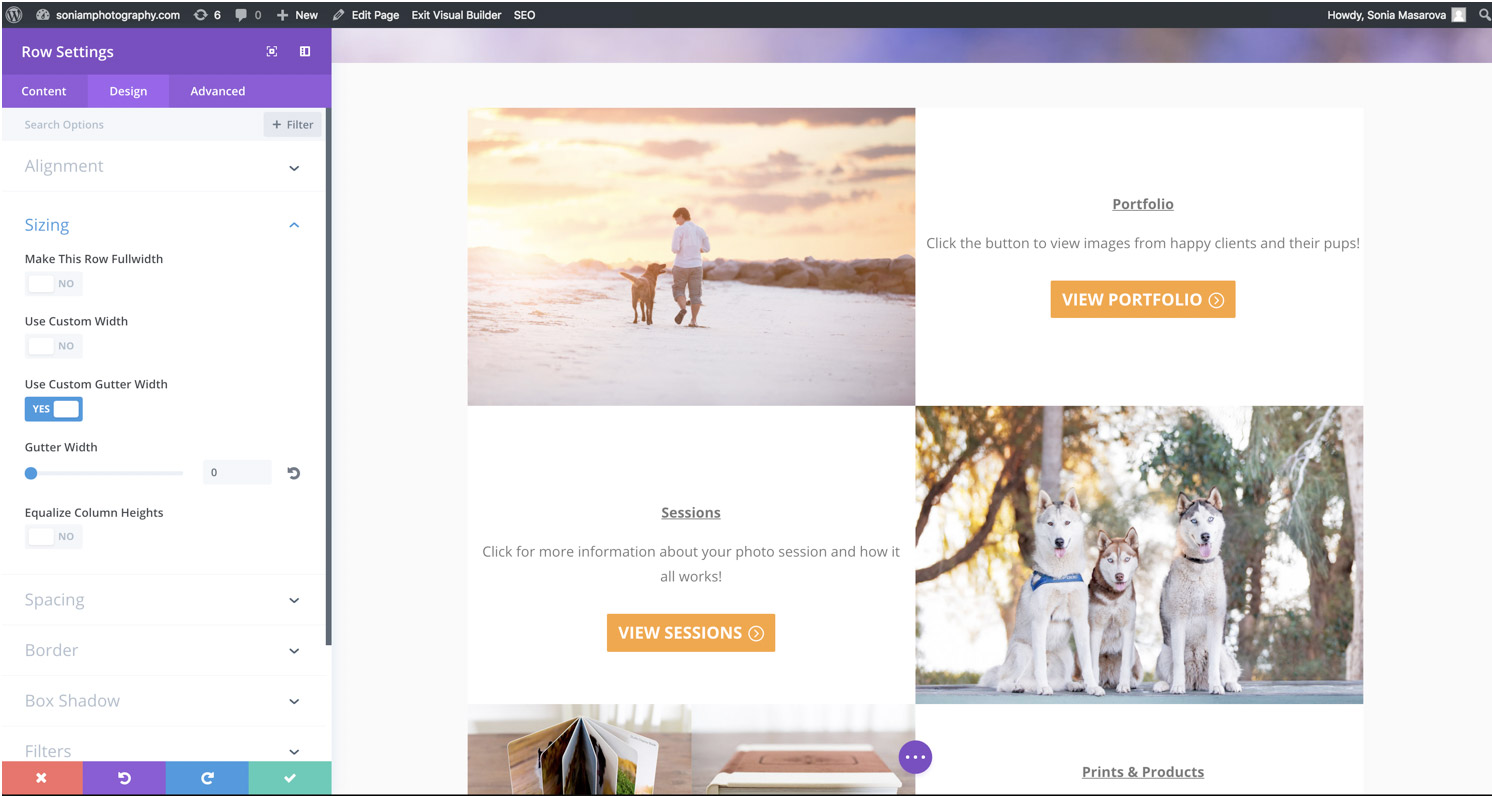
Page design / layout
There are a few interesting options to check out in this section.
Choose whether or not you want a “boxed” layout to your site. If selected, your site content will be contained within a defined box-like area in the middle of the page. The alternative, the site appears to take the full width of the screen (although the content actually remains at the same width in both cases).

You can also choose the content width, the gutter width (how much space between the content and the edge of the content boundary), the width of your sidebars, page section height and theme accent colour.
Site Identity
Here you get to set your websites Title and Tagline. If you can’t think of anything creative to put here, just enter your website name into both (in my case, “Steve Arnold Photography”.
You can also upload a SITE ICON in this section. This appears to duplicate some of what the Favicon does (showing your icon in the browser tab) but adds some extra functionality too.
Typography
Now you can really start to personalise the look and feel of your site by choosing the fonts and sizes for all the various text elements on your site.
There’s a lot to explore and play with, so don’t be shy – have at it!
Colours
Your sites colours are configured at various places within the theme customizer.
The main site background colour can be found under “General > Background Color”.
There’s also a “colour schemes” menu option that offers a dropdown with some pre-configured settings for link, text, button colours etc. But these can all be set individually too.
And your text colour settings can be found in the Typography section.
Footer
Another important area of your site is the site footer. This is the section that appears at the bottom of every single page on your site.
You can keep this minimal if you like, or you can add whatever information, links, images, contact forms etc to your footer that you like.
Whatever you choose, you can set this all up in the “Widgets” menu option in the Theme Customizer.
Here’s what my website footer looks like at the time of writing, for example:

Other WordPress settings
Permalinks
This is a technical term for the text that makes up the URL of each individual page and post on your site. The bit that comes after your domain name.
Take the following for example: stevearnoldphoto.com/how-to-build-a-website
The permalink (also known as a slug in wordpress), is the part after the forward-slash highlighted in yellow.
There are numerous ways in which WordPress can automatically generate permalinks for your pages and posts when you create them.
For example, you might like to include the date in your blog post URLs:
stevearnoldphoto.com/2018/12/25/how-to-build-a-website
However, it is recommended for SEO purposes you simply stick to the “postname”. For some reason, this isn’t the default selected option so you will want to change that before you publish any posts:
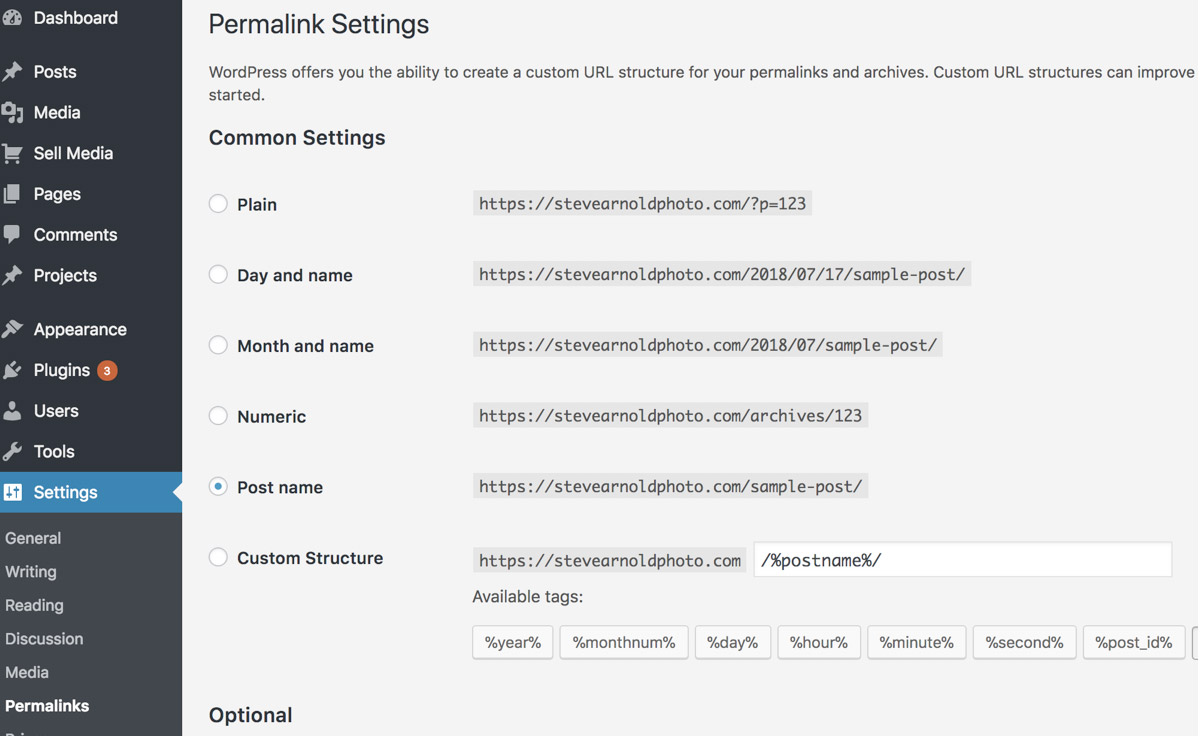
If you’ve already installed Yoast SEO plugin and gone through the configuration and recommended setup steps there, then this setting may already have been updated by that process. Still, take a look here to make sure.
User Profile
Finally, you can browse to “Users > Your Profile” in the WordPress dashboard to personalise how you want your information to appear to readers on your site. This is pretty straight forward so we don’t need to go into detail here.
STEP 8: Configure your static pages
The next thing you’ll want to do is create and write your static pages.
Pages like, “about me”, “services”, “galleries”, “contact” etc.
If you’re using theDivi theme, then you can choose between two methods of creating yourpages.
1: via the standard wordpress page authoring screen
2: via the Divi visual builder
The standard wordpress page authoring screen has all the regular text and image formatting tools that you’d expect with any word processing software.
This allows you to create some simple (but elegant) page content.
If you want total control over how your page is laid out, then you can use the Divi page builder to literally drag and drop text, images, and other elements onto your page wherever you want them.
To save time, you can save your favourite page layouts that you created with Divi builder to re-use them on other pages later.
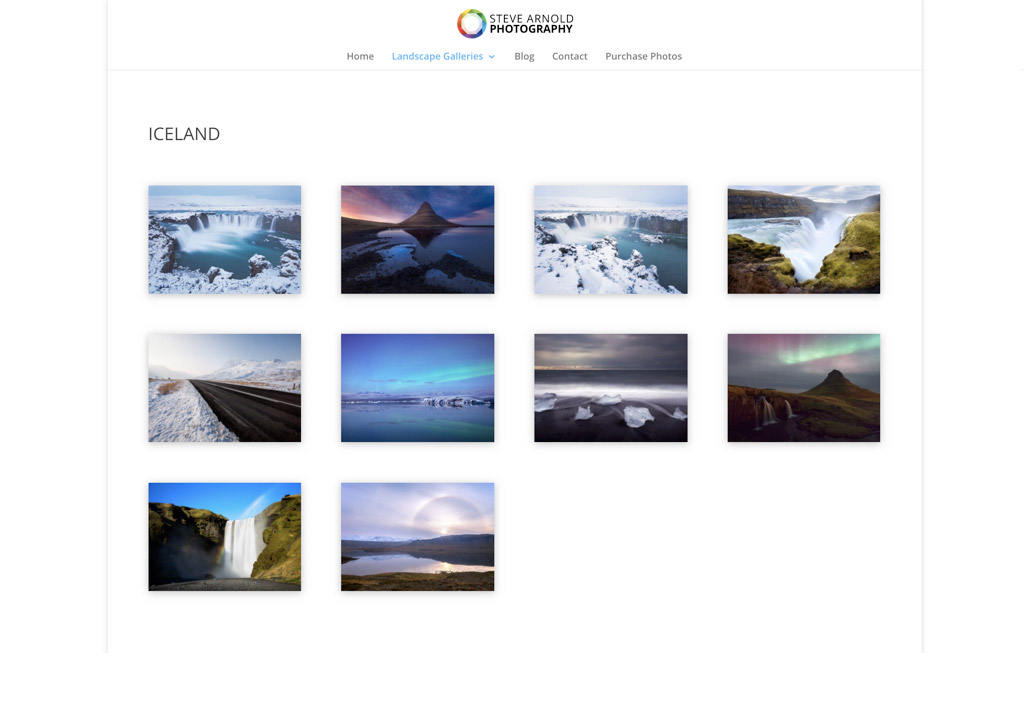
Divi Page Builder – Creating a Gallery
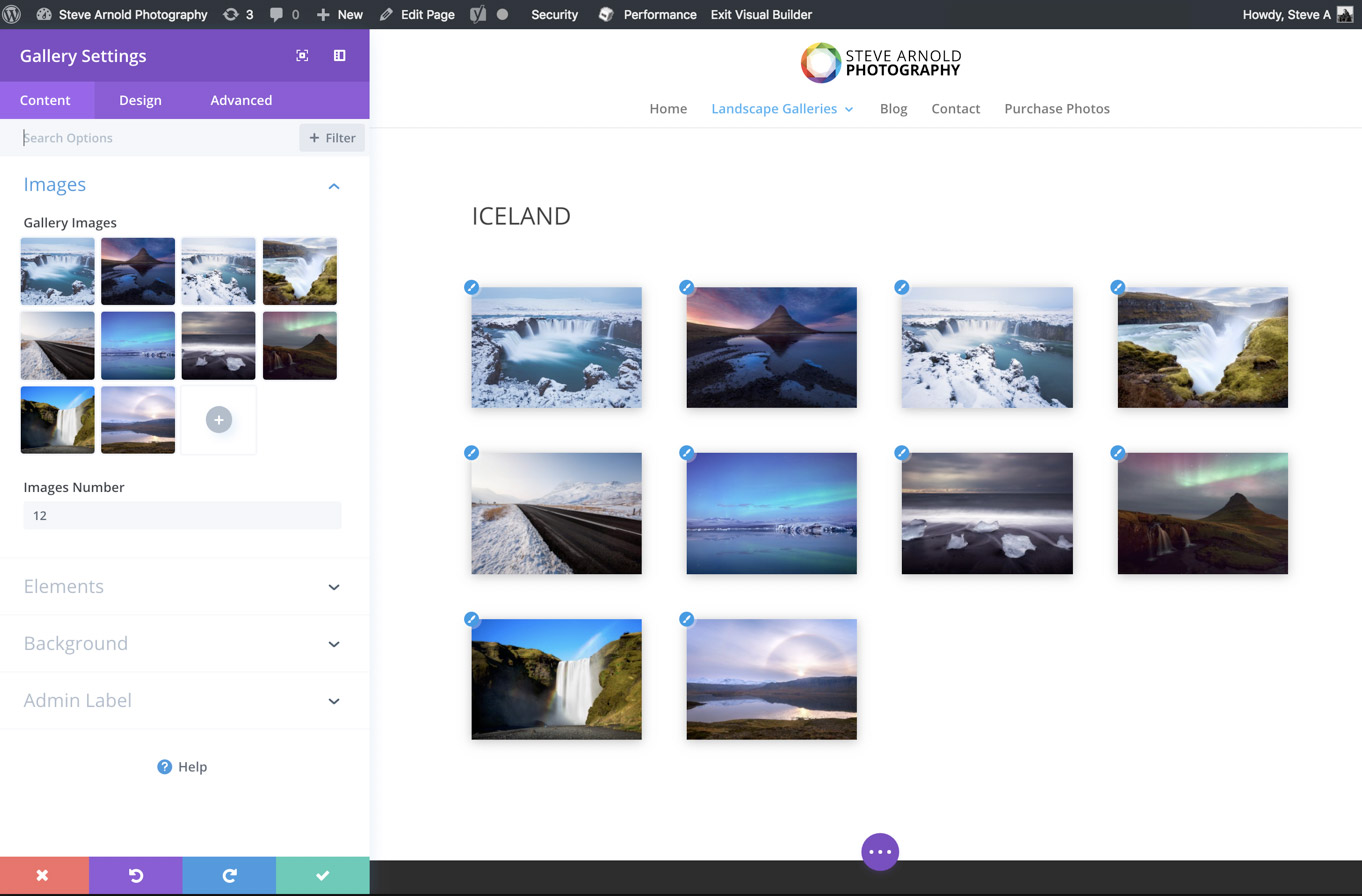
Divi Page Builder – Creating a Custom Page Layout
STEP 9: Configure Your Website Menus
Once you have your first set of pages ready, you can add them to your websites main menu to make them accessible to visitors.
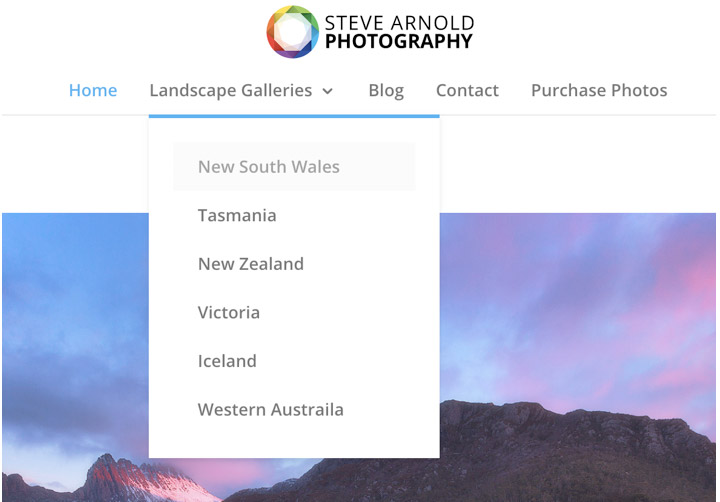
WordPress allows you to create various levels of parent/child menus, like so:
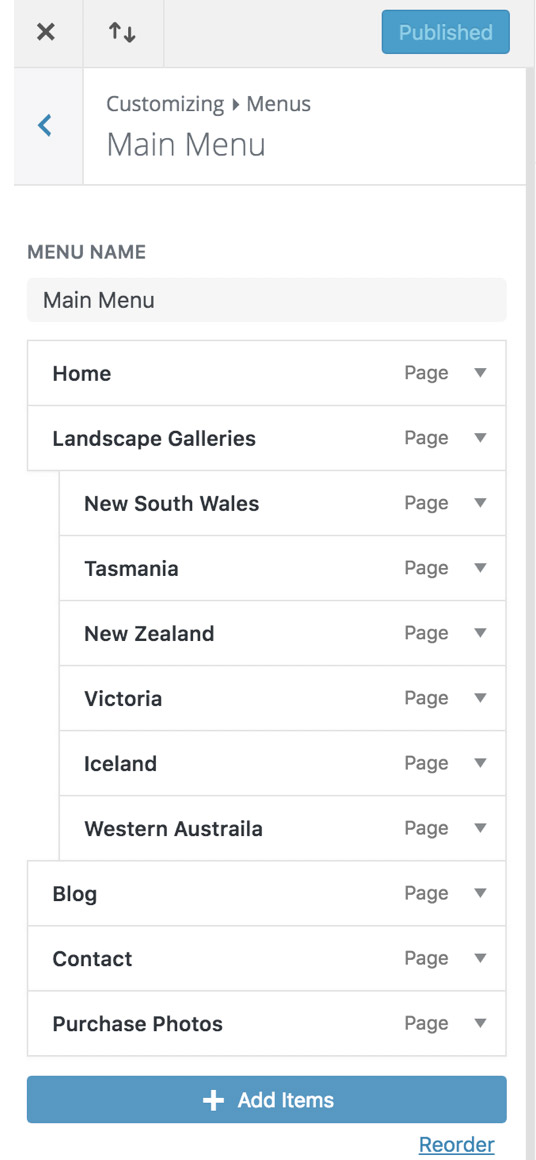
The indented menu items (pages) in the screenshot to the left are sub-menu items of the Landscape Galleries parent menu item.
This configuration creates a dropdown menu that appears when the Landscape Galleries menu is hovered over with the mouse:
STEP 10: Configure your first few Blog Categories
Pages and “posts” are treated differently in wordpress. Pages are static content that will only appear on your site after you’ve placed them in a menu.
Posts are automatically published to your blog page, with the most recent posts appearing at the top of the page and older ones below in reverse chronological order.
Posts can be categorised, so a reader can filter your posts based on whichever categories you’ve placed them in.
A post can be added to one or many categories, and categories can contain many posts.
The categories you choose for your site will depend on the kinds of articles and blog posts you’ll be publishing, but here are some ideas in case you get stuck thinking of some at this early stage:
- Travel
photography
- Europe
- Asia
- The Americas
- Wildlife photography
- News / Updates
STEP 11: Install and configure SEO Plugin
As awesome as Wordpress is, it’s not the ultimate package straight out of the box. What makes it awesome is not only can third party developers create custom themes and site designs, but there’s an entire “plugin” system which can be used to add custom functionality to your site too.
There are a handful of plugins (all free) that I recommend installing on a new website.
The first is Yoast SEO plugin.
Navigate to the Plugins section of your sites dashboard, search for “yoast”, install and then activate the plugin.
You’ll then be prompted to walk through the plugin setup via a series of questions. Follow the steps, and you’ll be ready to move on to the next plugin.
STEP 12: Install an Anti-Spam plugin
Unfortunately SPAM exists, and if you have comments enabled on your website pages and posts, people will attempt to write spam messages to your pages and posts.
Luckily, there are steps we can take to combat this – the first step is to install an anti-spam plugin which does most of the hard work in blocking spam for us.
Akismet is a good anti-spam plugin and usually comes pre-installed with WordPress. If your wordpress installation didn’t come with Akismet, you can easily download and activate it via the Plugins menu of your dashboard.
STEP 13: Install Security Plugin(s)
Hackers exist. It’s unfortunate, but it’s true and there’s nothing we can do to change that.
However, there are some simple steps we can take to make it not worth their bother hacking OUR sites.
The most common type of attack is known as a “brute force” attack, where someone will keep trying to guess your password until they hit the jackpot.
If it were one person sitting at their computer typing in passwords by hand, then the chance of them getting it right is miniscule. But that’s not how they do it.
They set up computers to automatically attempt millions of password combinations one after the other. Suddenly their win percentage increases massively.
So one simple thing we can configure on our site is to block anyone who has more than say, 5 failed password attempts.
Whenever a hackers automated computer gets blocked by our site, they don’t care, and it’s not worth them trying to get around it. They simply move on to the next site and repeat the process until they find one unlucky sucker who doesn’t have these simple security steps in place.
So with that said, there are a number of security plugins to choose from – and the free versions give us all the functionality we really need.
From the plugins menu in your wordpress dashboard, install and activate a plugin called iThemes Security and follow the steps offered to secure your site!
The plugin will take care of brute force attacks as I mentioned above, plus some further important “under the hood” fixes to secure your wordpress site as best as possible.
STEP 14: Install And Configure A Backup Plugin
As secure as your site may be, and as reliable as your web host may be, you always want to ensure you have a backup of your entire site – just in case something unthinkable happens!
I recommend using the Updraft Plus backup plugin for this.
The plugin can be configured to run a backup at whichever interval you choose (once per day, per week, per month etc – depending on how often you update your site).
It will take a copy of your sites files, folders, and database, and store it in a backup file.
To be totally safe, you’ll also want to configure the “off site” backup feature that’s included in the plugin. After a backup is complete, it will automatically transfer the backup files to your designated file storage service.
You can have the plugin send your backups to Dropbox, Google Drive, Google Cloud, Amazon S3 and more. Most of these will have a monthly price tag depending on how much space you need/use.
STEP 15: Install And Configure A Caching Plugin
This step is all about speeding up your site so that it loads as fast as possible.
This will not only lead to a better browsing experience for your visitors, but Google can potentially punish slow-loading sites by not showing them as high in their search results.
W3 Total Cache is a good all-round caching plugin, and I recommend it. After you install and activate the plugin, a new “Performance” menu will appear in your wordpress dashboard with lots of confusing options, which would require an entire guide of their own to explain fully.
For now however, you can get by by enabling the Page Cache and Browser Cache in the Performance settings. Beyond this, the tutorials provided by the plugin will help you learn the deeper mechanics of how this all works and what you should / shouldn’t enable.
OPTIONAL STEPS
STEP 16: Install And Configure Your Store
I’ve marked this step optional because not everyone wants to sell their photos online, but if you do, then this step is what will turn your website into an online store.
The two best plugins for turning your website into an online store that I’ve found are WooCommerce and SellMedia.
WooCommerce is probably the most widely used ecommerce plugin for WordPress, but Sell Media is designed specifically for photographers wanting to sell prints and digital files.
Both systems allow you to create galleries of images on your site, set custom pricing options for each image (size, paper type etc), and receive payments directly into your PayPal account (or Stripe if you want to accept credit cards).
Sell Media has one excellent option that WooCommerce doesn’t appear to have when it comes to selling digital files.
With Sell Media, you can let the customer choose the image, the image size, and licensing options, and then when they make their payment they are able to automatically download the correct image at their selected size – without any manual steps on your side.
Using this functionality, you can essentially turn your website into your own stock photography website!
Here are the basic steps to follow to set your site up for sales using Sell Media.
Step 1: Set up your price lists
Before you add any images for sale, you’ll want to create some price lists first.
I know it’s boring and you want to just get right in there and start uploading your images for sale, but doing this part first will make it so much easier later.
You can set price lists for Prints and for Downloads.
Price lists for prints is pretty straight forward. Simply add a new line to the price list for each combination of print size and type.
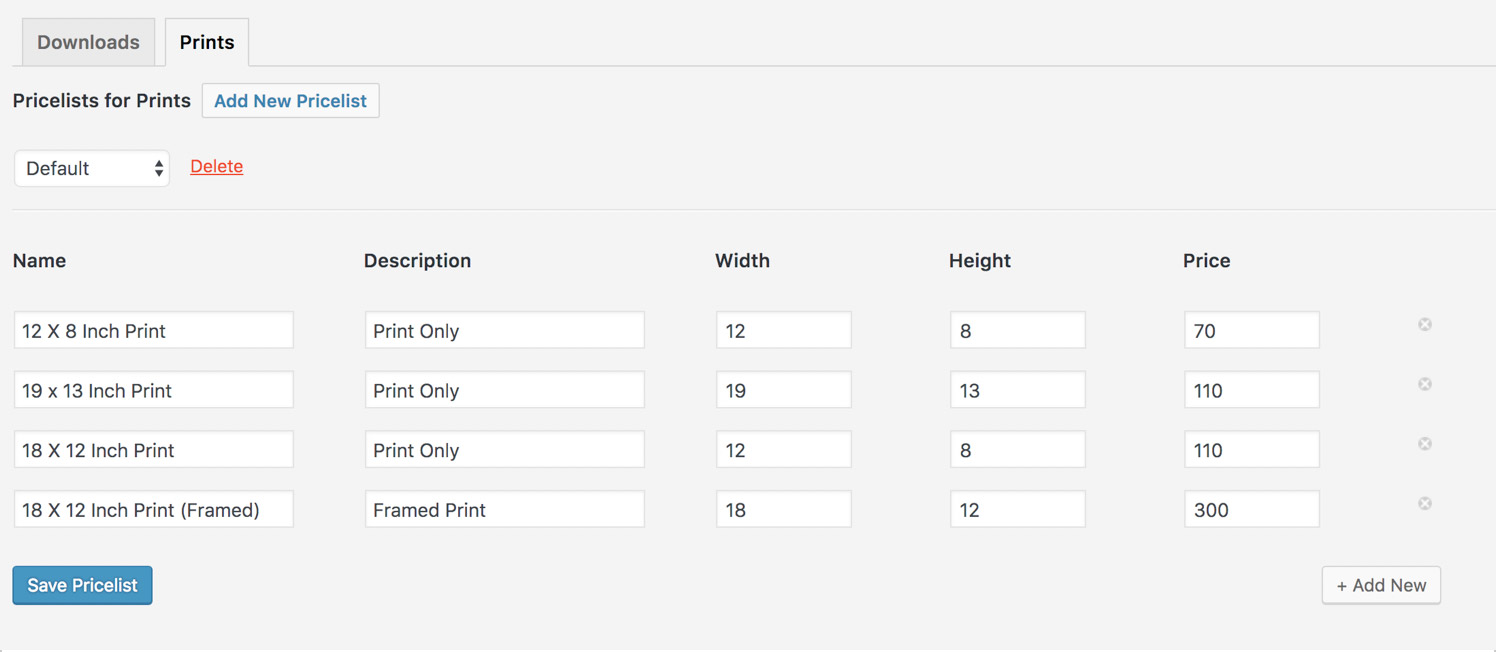
You can add as many different price lists as you like for prints, but you can only assign one price list to an image at a time. So if you want to offer print-only, and framed prints, you should add both options to the same price list (as above).
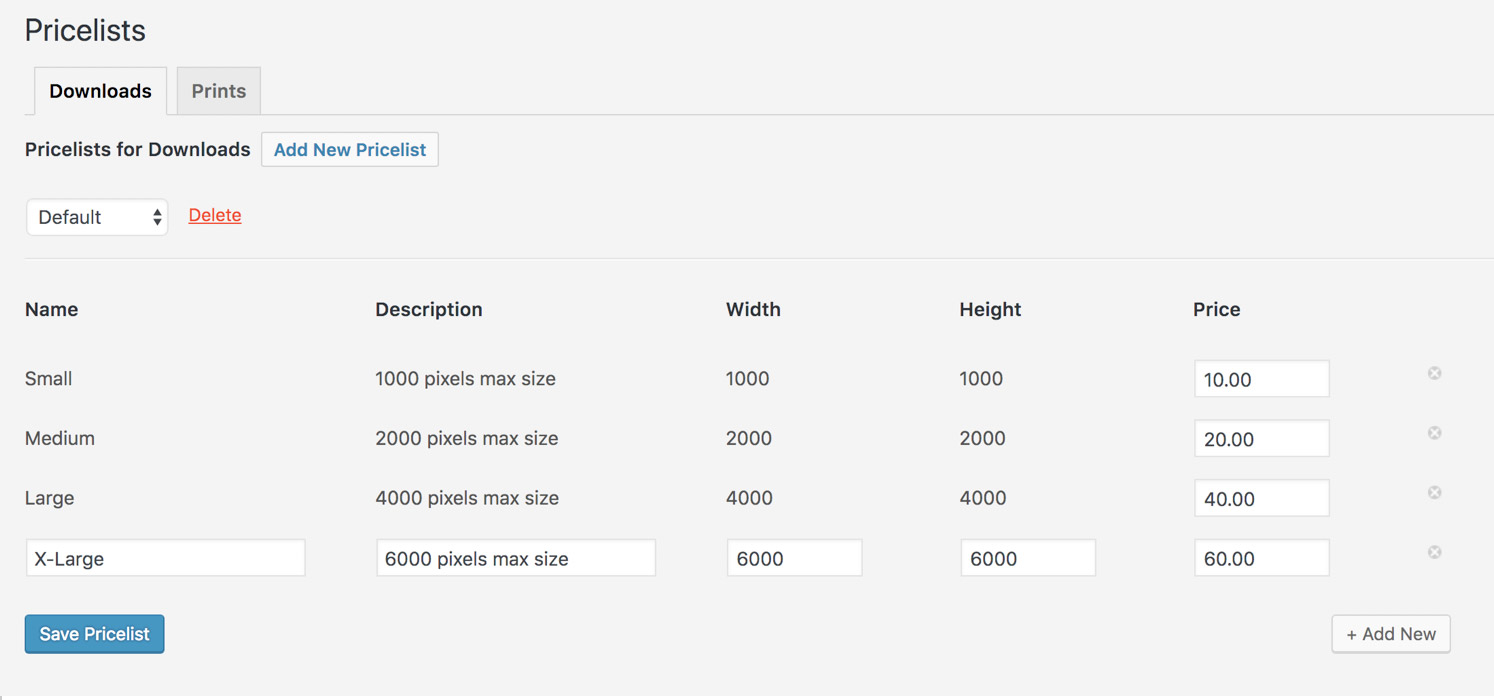
Price lists for Downloads work the same way, but rather than set the final price of an image download, you’ll set a base price. Then, when you set up your licensing options, each license will assign a multiplier to the base price given on the list.
Here’s an example of a base price list
Once you’ve set up your first price list(s), if you’re selling digital downloads you can move on to adding some licensing options.
Step 2: Add Licensing Options For Digital Downloads
If you plan on selling digital downloads, you’re probably going to want to set different prices for different usage rights.
The Licenses section of the Sell Media Plugin allows you to configure whatever licensing options you like along with a “markup” on the base price you configured in your Price List for digital downloads.
Suppose you have configured your baseline prices as per the screenshot above.
Then you add some licensing options at various percentage markups, here’s how those licensing multipliers would be applied to the base price to calculate the total price for a SMALL image:
| License | Markup | Small Base Price | Total Price |
| Commercial Use: Advertising (Online: Over 100,000 distribution) | 500.00% | $10.00 | $60.00 |
| Commercial Use: Advertising (Online: Up to 100,000 distribution) | 300.00% | $10.00 | $40.00 |
| Commercial Use: Advertising (Print: Over 100,000 distribution) | 700.00% | $10.00 | $80.00 |
| Commercial Use: Advertising (Print: Up to 100,000 distribution) | 500.00% | $10.00 | $60.00 |
| Personal Use: Merchandise | 100.00% | $10.00 | $20.00 |
| Personal Use: Print | 50.00% | $10.00 | $15.00 |
The great thing about how this all works is that you set your price list and your license multipliers and the correct total values are automatically calculated for every image you apply this combination to. You don’t have to set the prices individually on each image at each size (that would be a nightmare!)
It also means you can bulk-update your pricing across all your images by updating your price lists and licensing markups.
Step 3: Adding products and collections
It can take a bit of getting used to, but here’s how the structure of setting up your images for sale works:
You can add images for sale by uploading them as a “product” to the “products” section of the Sell Media settings in the WordPress dashboard.
You then create “collections” of products in the “collections” section.
You then choose one or more collections to display on the pages of your website.
When you upload an image or set of images to the products section, you are presented with the options to choose which price list and licensing options to apply to them. You can also choose to have them available as prints, digital downloads, or both. You can also add them to existing “collections” or create new collections on the fly.
Step 4: Add collections of images to your website page(s)
Once you have a collection full of images, you can then add a gallery view of that collection to any page of your website by inserting a special “shortcode” (shortcode is a wordpress term for a short piece of code that adds or performs some kind of functionality to a page. The exact shortcode you need for this step can be retrieved from the Sell Media plugin documentation).
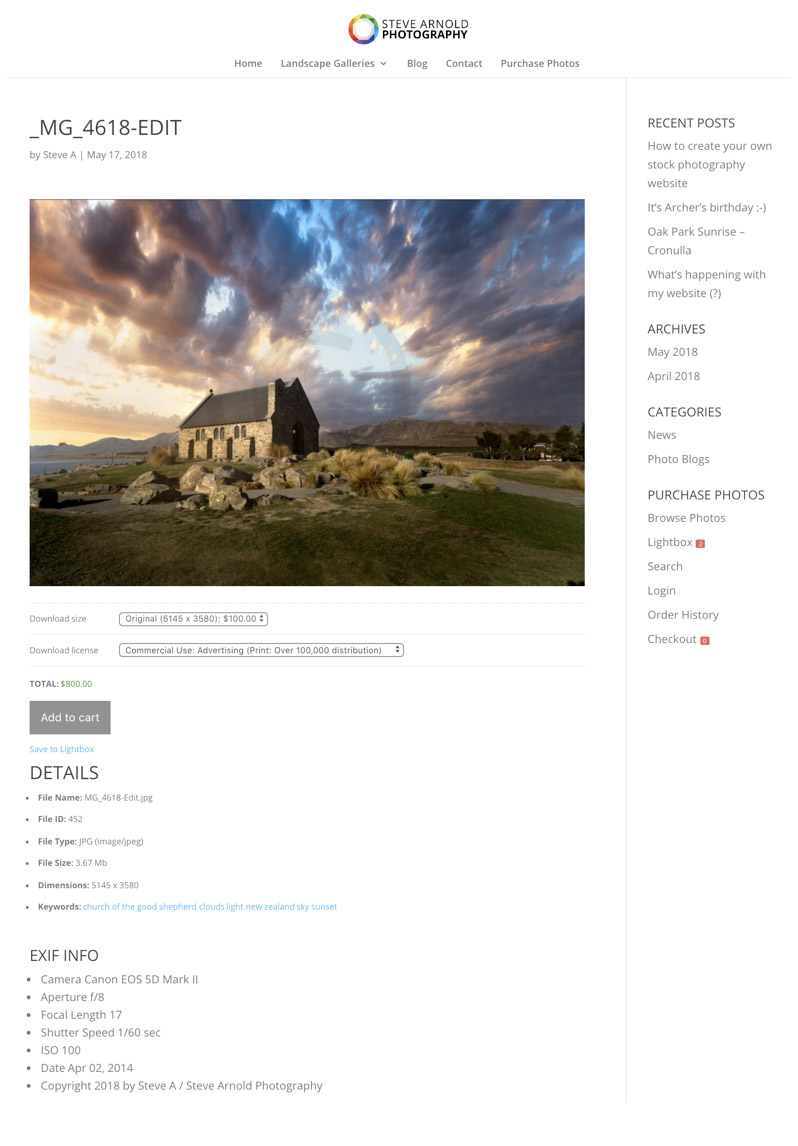
Here’s how it all looks once you’ve put this together:
Main page containing the collection shortcode:
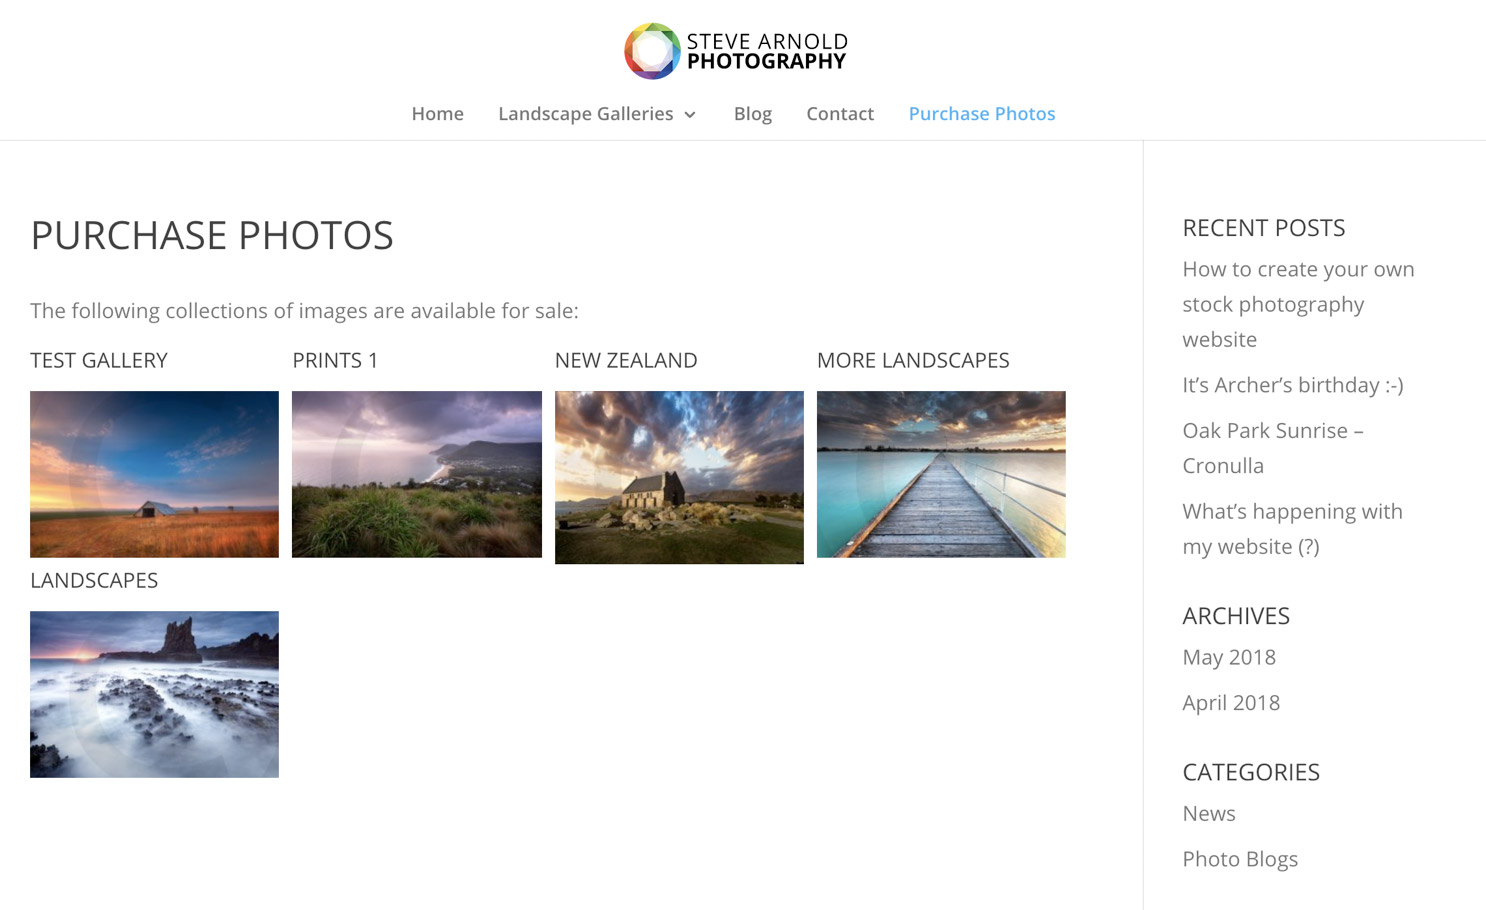
Because I uploaded multiple images at once in theProducts page rather than upload individual images, clicking on each product in the view above takes us to a gallery view of all the images within that product:

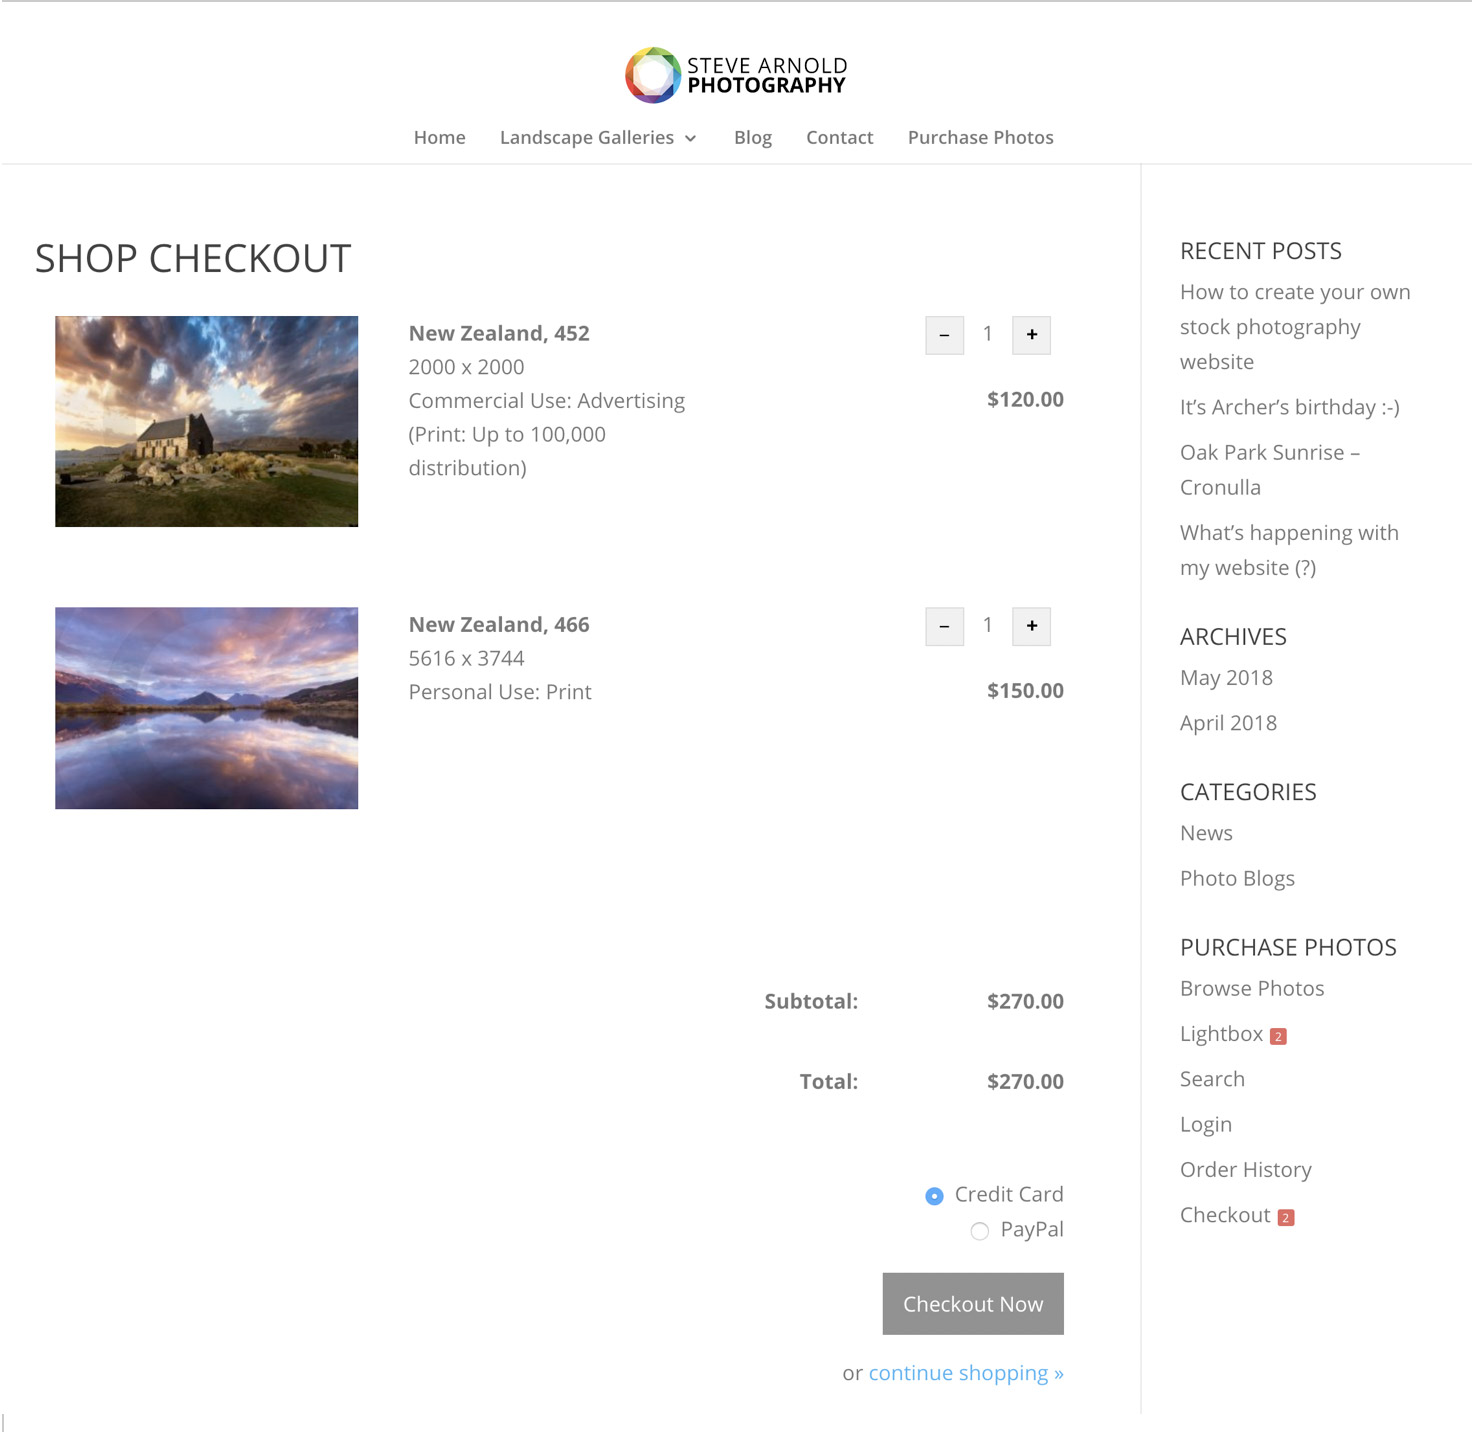
Clicking on the Quick View link of each image reveals a popup where the user can select their preferred buying options:
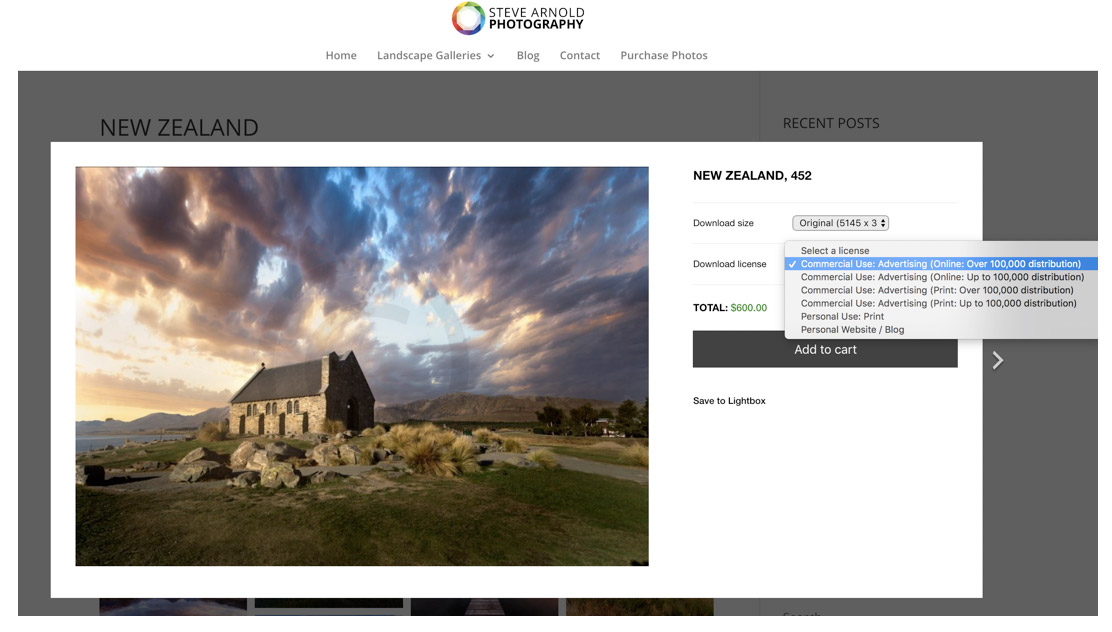
Alternatively, clicking on the image and not on the Quick View link will reveal the main info page for that image, along with the purchasing options:
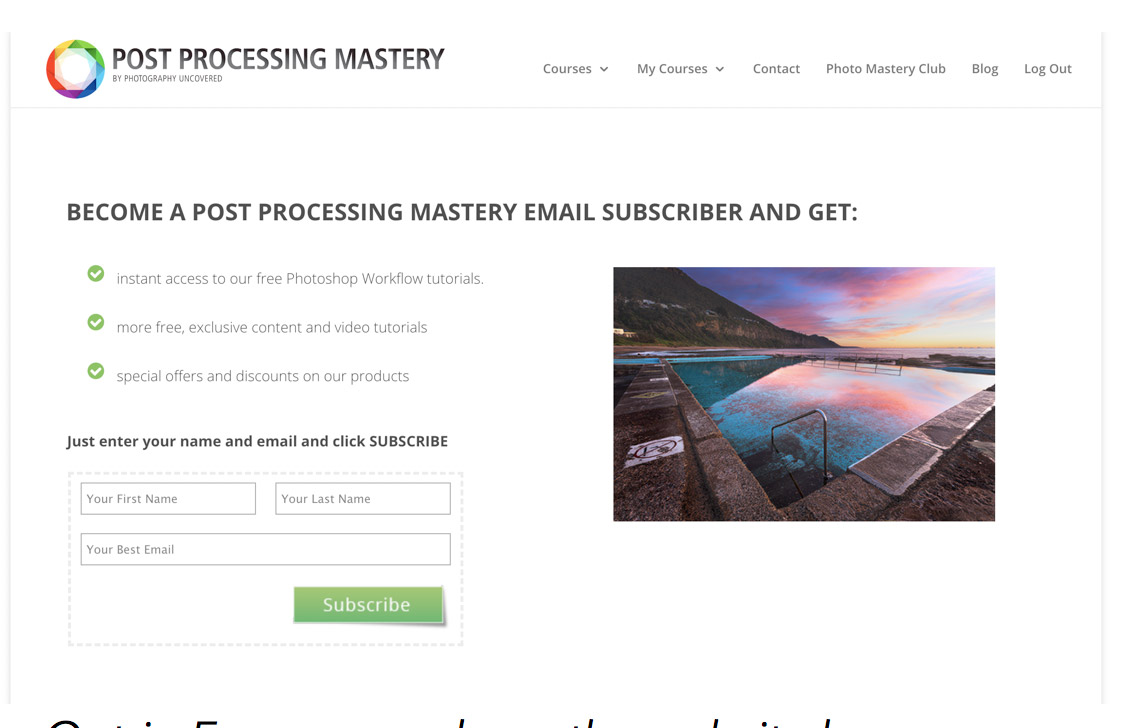
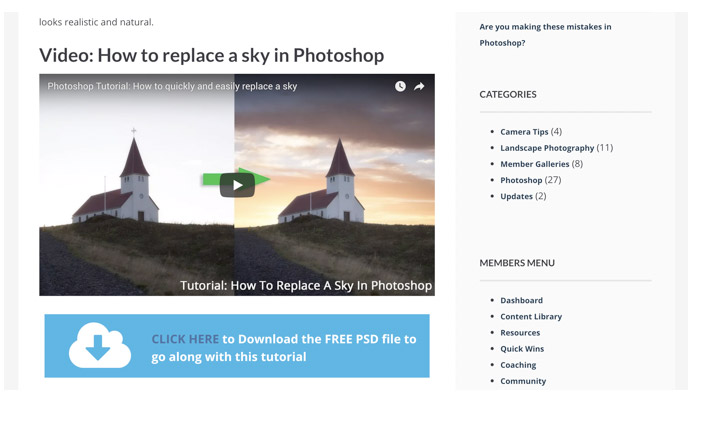
STEP 17: Add Email / Newsletter Signup Pages And Forms
No matter what the purpose of your website, whether you’re selling images as prints or stock, blogging, selling educational products (your own or others as an affiliate), or any other purpose, you should seriously consider adding email signup forms to your website and sending regular newsletters and updates to your readers.
When you have readers opt in to receive emails from you, you’re building the best possible kind of online audience. Email beats out and other kind of media for the simple reason that you own your list.
Building a huge following on Facebook used to be the fashion… Until Facebook changed their algorithms reducing the reach of each post to less than 10% of their fans on average. You don’t have to look very far to find people complaining that “Facebook wants me to pay to reach my own fans!”.
Just take a look at some of the largest photography pages on Facebook, note how many fans they have, then note how many Likes each of their posts have… It’s a minuscule percentage and goes to show that Facebook isn’t showing their posts to their fans!
Not an issue with email.
Instagram at the time of writing has been huge for many photographers. Those who got in early and have been able to build audiences of 100,000+ followers have seen a lot of success, but those audiences are becoming harder to build… And because Facebook owns Instagram, who knows when they’ll flip the switch and stop showing their posts to the majority of their followers, forcing photographers to pay for ads to reach them.
These issues simply don’t exist for photographers who concentrate on building their list of email subscribers. Nobody can move the goal posts on you, because you own your list.
So with that said, I will always recommend encouraging your readers to sign up for your email list.
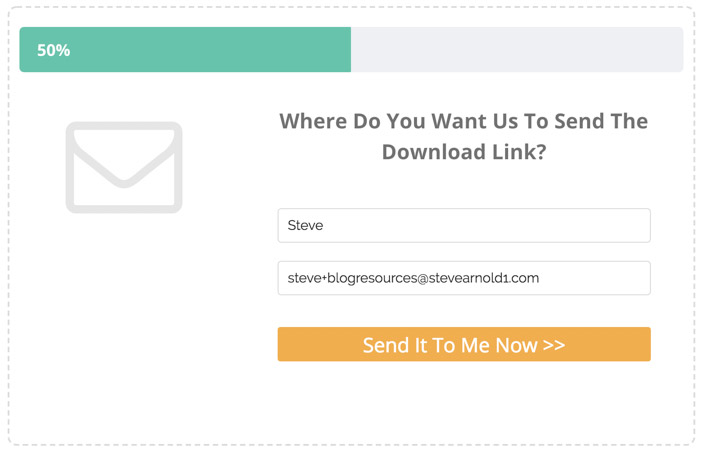
The step by step instructions on how you set thisup will differ depending on which email service you subscribe to, butthe main objective is to create something that your subscriber want,then offer that to them in return for their email address on a formon your website. From that point on, you are free to email them asoften as your heart desires!
Want me to do ALL of this for you?
I wrote this guide to help assist those of you who have been thinking about setting up your own website but just needed steering in the right direction. It started out as a checklist, but has grown to cover a lot of detail that will help you put this all together yourself.
But with that said, if you’re reading this as someone who wants your own website, who loves the sound of having all this in place, but even with this guide it seems too complicated or time consuming – or maybe you can do it but you just want someone else to do it for you…
Then GREAT NEWS!
This is exactly what I can offer you.
Every single step of this setup, I can do it for you.
Not only that, but I host your website on my own servers thereby eliminating the monthly cost of separate web hosting.
I manage all your theme and plugin updates.
I take care of your website security.
I manage your website backups.
All you have to think about is creating great content for your website!
If this sounds AWESOME and you’d liketo find out more, click HERE now.